For shower installation, we fit all types of showers, installing shower's running water supply pipework, flooring and installing false ceilings and stud walls, shower pumps and the used water pipework. Also, we add heated towel rails and heating systems to the floor, plus enclosures and shower trays.
Some showers like electric ones go a long way when you need a hot refreshing bath in instant hot water. This info shows the relevance of safety and correct installation procedure. Therefore, you may engage our part-P certified plumber and an electrician to install your shower correctly. This article covers what to expect in installing electric showers plus other factors to consider in the whole process.
Which shower system do you have? If you have a gravity-fed water system that contains a cold-water storage cistern and hot water cylinder in your loft, you have diverse options compared to other systems. That means you could choose the mixer shower containing a shower pump or without one. You can also choose an electric shower or a power shower.
With a combination boiler or in case the cold-water supply comes directly from the mains, you can choose an electric shower or the mixer shower. The limited options happen because combination boilers don't allow shower pump installation.

While installing an electric shower, we first prepare the pipework and fitting an electric supply.
As we prepare the pipework, we begin by running one fifteen-millimeter pipe from the cold-water store through the wall where you intend to install your shower. Next, hold the shower unit in position and mark the inlet positions for the power supply cables and the inlet pipe.
Note, we ensure that there are no buried cables and pipes before drilling your wall. After that, We run your inlet pipe through the marked region, then fit the isolating valve inside your inlet pipe. Insert a suitable connector for your shower inlet.
First, drill a hole through which you" pass the electric cable for power supply. You'll require a cable running from the shower unit position to the ceiling-mounted pull-cord double-pole switch. The cable's size depends on the kilowatt rating of the shower unit you want to fit; hence ensure you check the manufacturer's guide.
The switch to which you connect your cable has an off/on indicator; hence you don't have to put in the Hazard Zones one or two as required by the wiring regulations (IEE). However, when installing an electric shower unit, you need an independent dedicated circuit from the consumer unit, which we can easily install for you to ensure safety.

Electric showers operate similarly to a kettle; as the water passes through, it gets heated. While using the electric shower unit, you can regulate the temperature by controlling the rate of the water passing over the element. Most shower units have no thermostat; hence the incoming water's temperature affects your shower's temperature.
You can install an electric shower in separate cubicles or over your bathroom. Either way, our qualified technicians ensure there's enough room around the shower enclosure cover which may require servicing in the future.
Also, the type of your electric shower unit determines the size of your cable. The hot and cold-water supply enters from the rear, top or bottom. Hence we keenly observe the instructions to ensure you have sufficient cable to connect the terminal block. Before fitting the unit, we flush any debris in the water inlet pipe by turning on the water, after which we turn it off and drain the inlet pipe. This is the procedure we follow.
First, hold your unit and mark the correct positions and drill cable and inlet pipe holes. Then, drill holes in your wall at the marked positions using the masonry bit. Note that if your drill surface is tiled, use a stick masking tape or a tile bit on your tiles to prevent slipping. Afterwards, install wall plugs squeezing a little sealant into each wall plug.
Through the backplate of your shower unit, you have holes through which you'll feed your inlet pipe and electric cable. Each shower unit comes with screws which you'll use to screw the shower unit to the wall.
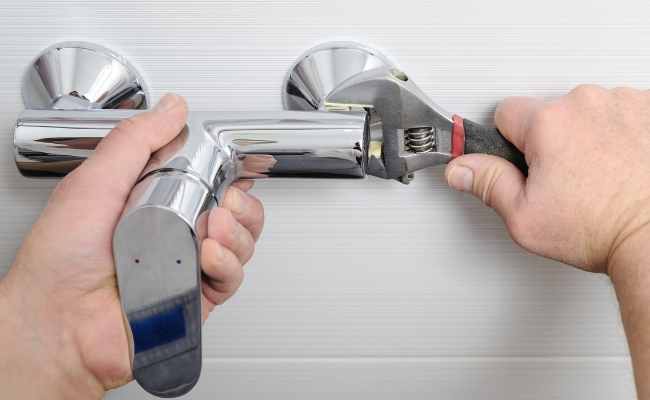
Connect the cold-water inlet pipe to the shower unit, then use a pipe wrench to tighten the pipe's compression fitting.
Fix the power cable to the shower unit by connecting its neutral and live core to the terminals labelled 'load,' and the unit's earth core to the earth terminal.
Fit the shower's cover according to the manufacturer's instructions as you ensure that you put in place its rubber seal.
Fit your shower rail, ensuring it's high enough so that the showerhead doesn't dangle below twenty-five millimeters below the spill-over level of your shower tray, washbasin, bidet, or bath. Otherwise, dirty water could drawback to your clean cold-water supply.
Screw the hose's end to the shower's handset, ensuring the washers are supplied. Follow the manufacturer's instructions as you check whether it's working well before you screw the other end.

Ensure all the shower parts are present before starting the installation of the mixer installation. Also, check the valve openings to ensure they're covered, preventing any debris from entering as you work inlet pipework. Finally, ensure the shower valve suits your wall type.
After deciding the position for your shower, assess the ideal direction of the inlet pipe entry, whether rising, rear or falling entrance. Complete the pipework to the unit area. To prevent movement after you install the thermostatic shower unit, securely attach the hot and cold-water pipes to the panel or the wall.
Before you connect the shower valve, ensure you fit the compression olives correctly and that you've flushed the pipework. Then turn on the water supply to check for leaks. Afterwards, install the water outlet fittings referring to the manufactures guide.
Added pump boosters to your thermostatic mixer unit can double the water flow rate. Although it's noisy, you can tuck it away in an airing cupboard, and you'll still hear it in action.
For maximum pump use, we recommend you install larger hot water cylinders. Note, it's not possible to connect your pump to a combination boiler or a water supply from the mains.

While installing a Hot and Cold water shower, we ensure that the waste pipework is ready so to efficiently fix the shower tray connecting it to a waste outlet. Before installing a shower tray, we ensure that we go through the manufacturer's guide because different designs require slightly different installation techniques. However, the following is a step-by-step process you can follow.
Hold your tray on the side and run a cover of sanitary silicone sealant around the trays' waste hole.
Put the tray's waste outlet into the hole to go into the sealant. Ensure you've fitted all the supplied washers as you use an adjustable spanner to screw them on the locking nut. Then install the trap properly to the waste outlet.
Wear protective gloves, and using an output motor, mix the mortar. Using a trowel to place a thin layer where your tray will go on the floor and put it appropriately.
Bed your tray into the mortar as you use a spirit level to ensure it isn't sloping. If you can't level your tray, lift it and adjust your artillery. Then remove any excess mortar using the trowel and tidy its edges. Finally, open the floor hatch and connect your trap to the waste pipework.

Our research done from thirty-seven different shower installation companies across the UK shows that on average, they charged three twenty euros with a range of one-sixty to five hundred euros. That translates to an average of three-eighty-five dollars and a range of $193-$603.
The labor requires three to eight hours. Shower installation cost depends on various factors, which means it's tricky to adequately inform you on the price range without a property inspection from a qualified professional. Note that the above-average costs don't include the price of your shower.
We effectively install showers because of our adequate preparation and qualified plumbers and electricians, whether it's replacing batteries or installing new ones in new spaces. For great effective services, engage us and we'll happily oblige. Happy shower installation!
Information to be placed here soon!
Information to be placed here soon!